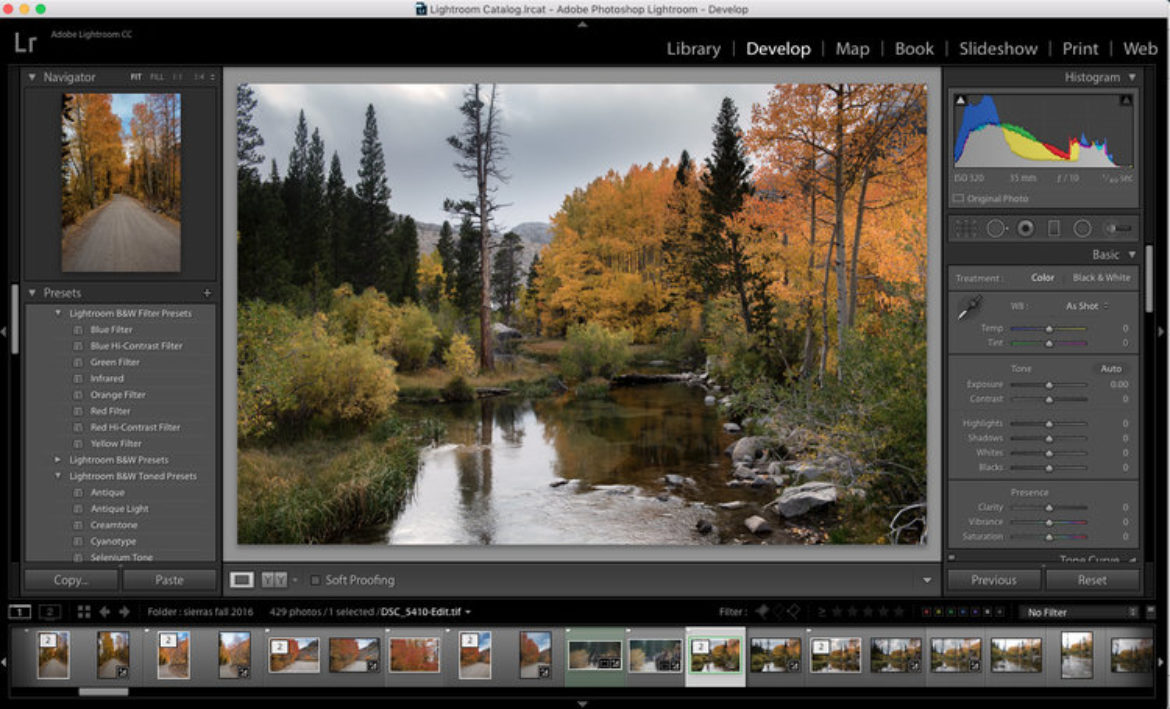
Post-processing refers to image editing/re-touching in photography. It is used for improving the image quality & accuracy. While it is good to get it right in the camera but at times you have to add right amount of oomph/Wow factor to your image at post processing/ editing table. The Editing can be much better on RAW format image. The Editing, Retouching & Post processing image is fun, enjoy it.
- Chose the right type of Software – the top two & most popular software are Adobe Photoshop & Light-room. The beginners can use Pic Monkey & Picasa. The Cell phone user can use in-built basic editing features like filters, cool effects for images etc.
- Enable the lens correction – Correction can be done at the profile tab to clear distortion from the corners of frame
- The basic adjustment panel is your BFF (Best Friend Forever); 80% of adjustment happens in the Basic Panel – White Balance, Temperature & Tint are most commonly used sliders
- Adjust the horizon & straighten the images, set the Contrast & Brightness – for leveling the image
- Remove the lens flare – sometime shooting directly into sun causes flares, you can have control on removing flares
- Paint Colour into a Sunrise & Sunset – use extra Colours into your images – use Colour adjustments to enhance the image
- Create a Magical Feel (Orton Effect) – Use Heavy Orton or Subtle Orton as per your image requirement
- Cutting Through Haze – use tools to clear haze & create a nicely contrasting scene
- Detail Enhancer – while doing contrast changing you can draw beautiful texture & patters to compliment the scene
- Remove Strong Colours Cast – Use Colours Correction Tools
- Change light Balance – Nik Colour Efex to Darken/Lighter center filter – Vignette
- Shadows & Highlight – use Tool to improve the Shadows & Highlighting the image – in tune image setting
- Dodging & Burning – You can adjust Shadows, Midtones or highlights
- Frequency Separation – Great Technique for smoothening the skin, can help using frequency separation on clothes, skies, backdrop or any other important place to give affect
- Black & White Layer Changed to Soft Light – helps to control luminance of each colour with the slider on the black & white layer. You can vary it with Red & Yellow sliders to change the skin tones
- Toning using the Colour Balance, levels & Hue/Sat Adjustment Layers –most fun part of editing & experimenting with different tones to get different look of image
- Crushing Highlights with Curves tool – helps to give the image a weird colour shifts
- Using Layer Masks – best technic to use affects. Need to remember that White Reveals & Black Conceals
- Use HDR Effects in Photoshop
- Create an old film effect, Vintage Black & White Effect in Photoshop
- Replace the sky using Photoshop
- Create a Newborn Composite Photo in Photoshop
- Whiten the Teeth in Photoshop
- Changing the hair Colours/tone in Photoshop
- Healing Brush to clear stains
- Adjust or Crop out any unwanted/distracting elements – Use clone /stamp toll in Photoshop or simple crop function.
- Remove any dust spots – use clone tool or even patch tool to clean out the dust spots on the image especially in black & white effect
- Adjust the Exposure, Temperature & Contrast – use contrast slider in Lightroom to improve the overall look & feel of images. Exposure & Contrast go hand in hand – help in sharpening the image quality
- Adjust Saturation & Vibrancies to add certain punch to the image. Use the tool gently with light hand as you don’t want image to look too processed
- Exporting from web or print – saving images on low or high resolution in JPEG format. Can use other format such TIFF, BMP, GIF etc. JPEG is universally accepted & can be used for all kinds of images for web & print


Recent Comments